 Millworker
 Panel Marking
Mark edgebanding, grain and miters on panels for the cut list and the nest, and show or clear the marks.
- An assembly of panel parts (for example made with Make Components from a multi-body part).
- Millworker tab → Panel Marking panel.
Marks are kept in the part files (attributes on faces and edges), so every copy of a part carries them. The cut list, the BOM and NestCAM read them. Save the parts after marking.
Each marking command opens a mini toolbar. OK keeps the changes and Cancel puts back everything changed in that session. Esc or starting another command also keeps them.
Mark EdgeBand
- Choose the band in the toolbar (Bands… edits the list; with a material database it opens the Material Manager).
- Click edge faces. One click bands a face. A face with another band switches to this one; a face with the same band loses it.
- Panel select on the toolbar: click a panel and every edge round it is banded at once (not hole or groove walls); click it again to take them all off. Edge select goes back to single edge faces. The choice is kept for the Inventor session.
- Pick another band in the toolbar and carry on: a part can carry as many bands as needed.
With the material database, the band's woodgrain picture or colour goes on the face too.
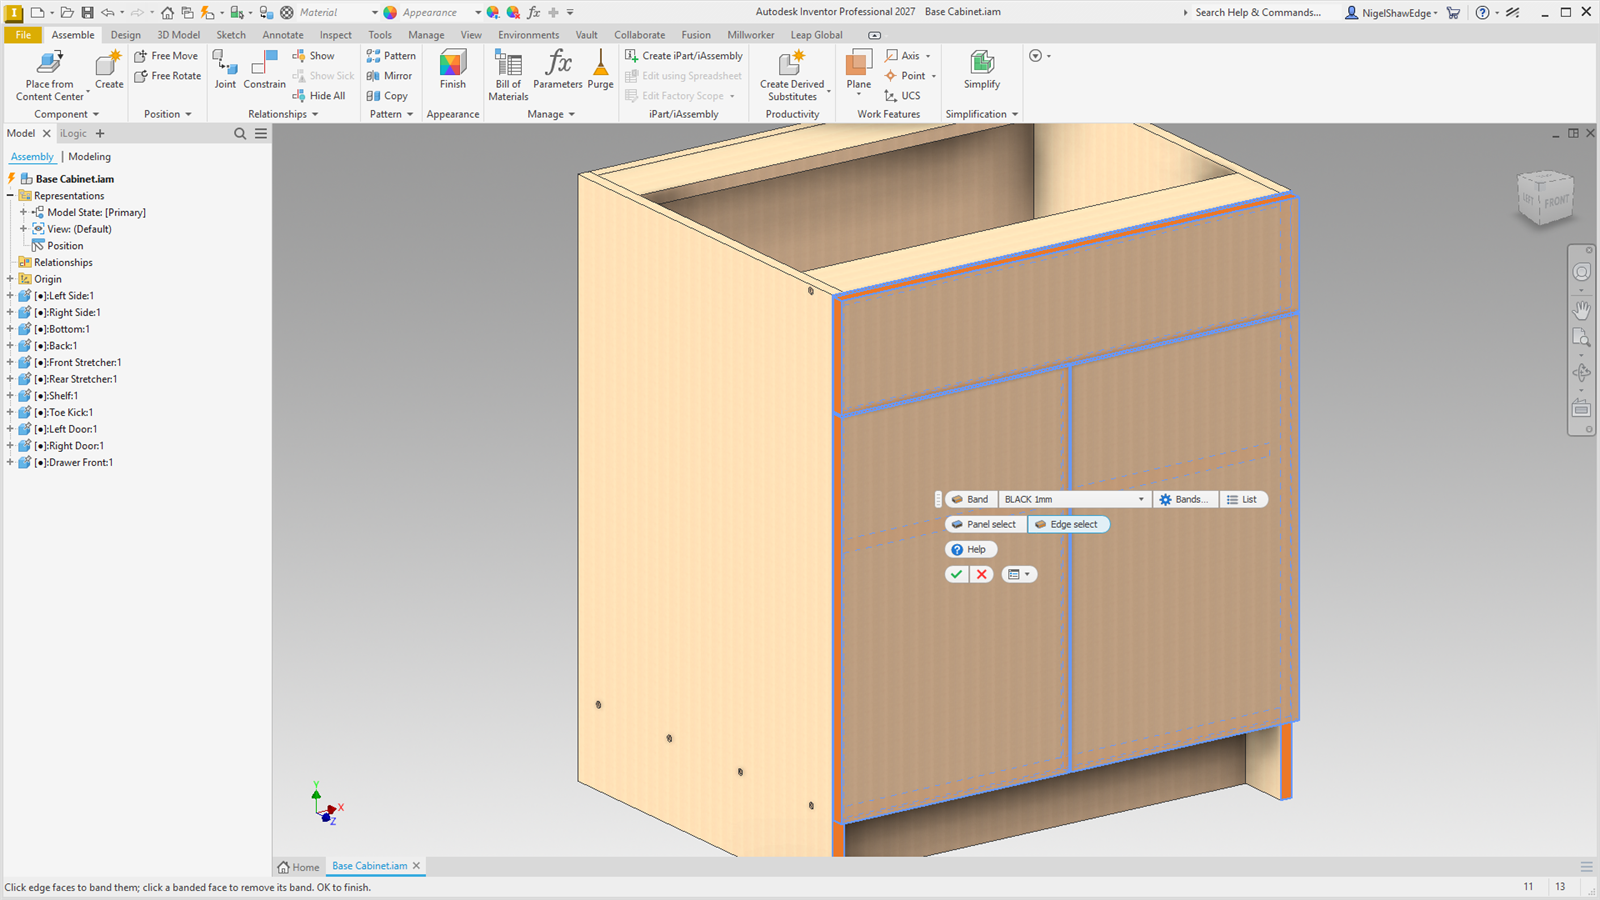
The Edgebands list opens beside the model with the tool (close it with its X; List on the toolbar brings it back). It has a row for each band on each part with how many faces carry it. Pick rows (Ctrl or Shift for several) to light their faces, then Remove band, or Switch to give them the band chosen beside it.
 Mark Grain
- Start Mark Grain. Panels already marked show a blue arrow; panels whose material has Grain ticked but no mark yet are highlighted amber.
- Click a panel's veneer face. A blue arrow shows the grain (along its longest straight edge to start) and marks it for the nest.
- Rotate 90°, or a second click on the face, turns it across.
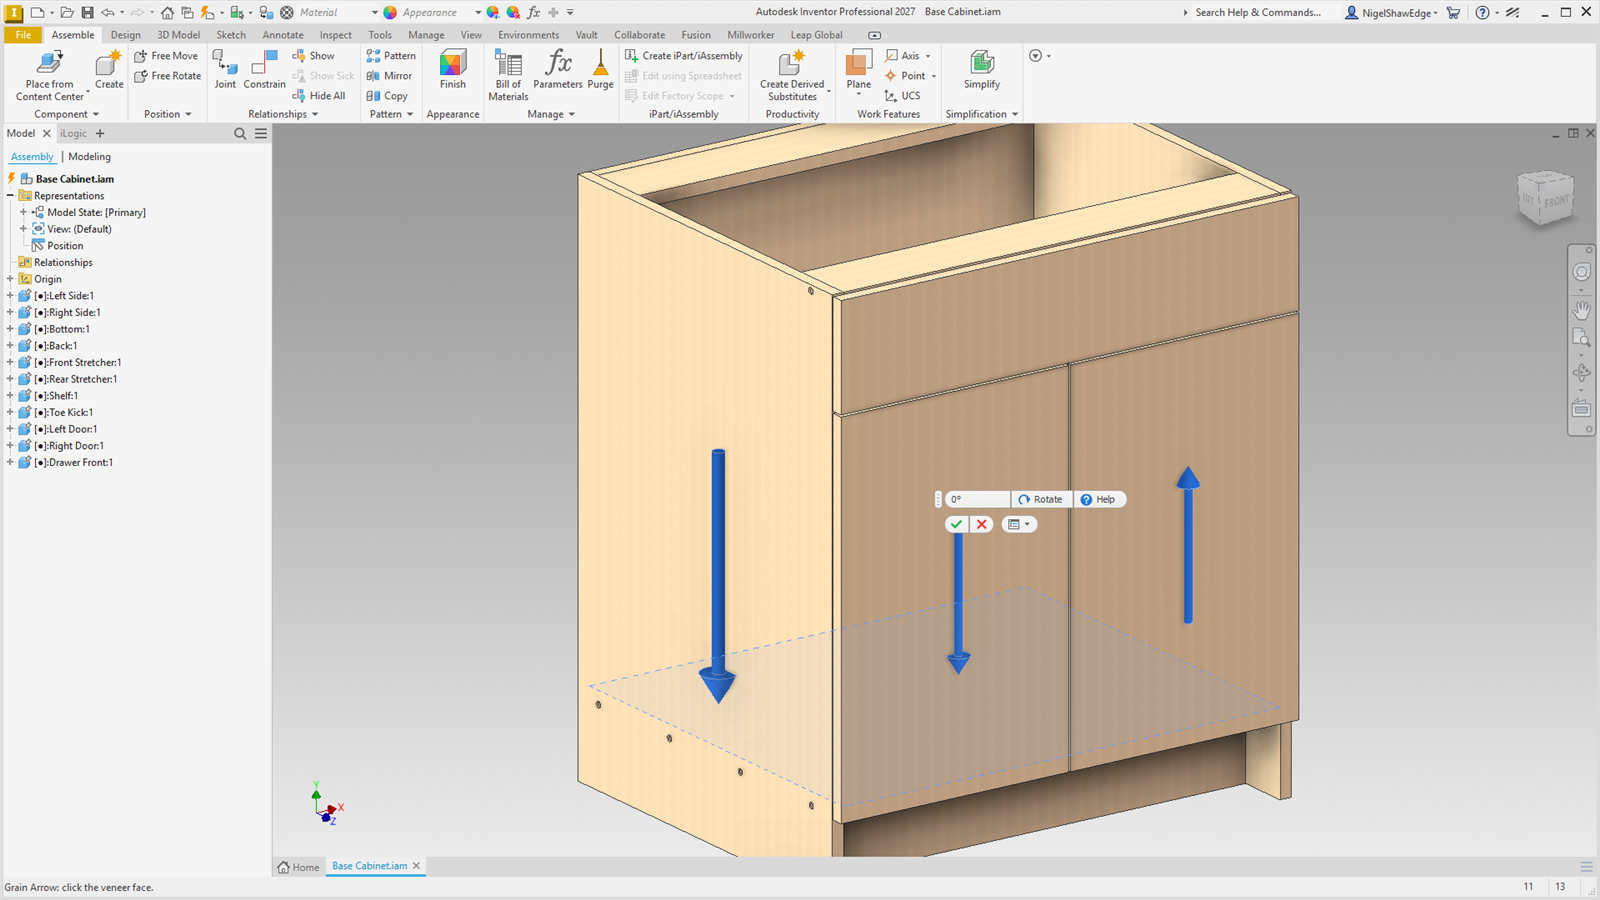
A panel has one grain; a new mark replaces the old one. Library and Content Center parts are left out.
 Mark Miter
Click mitred edge faces. The nest adds the miter allowance (1/4″ by default) on those edges, so there is material to machine the miter later. Miter Join marks its faces for you.
 Show Marks
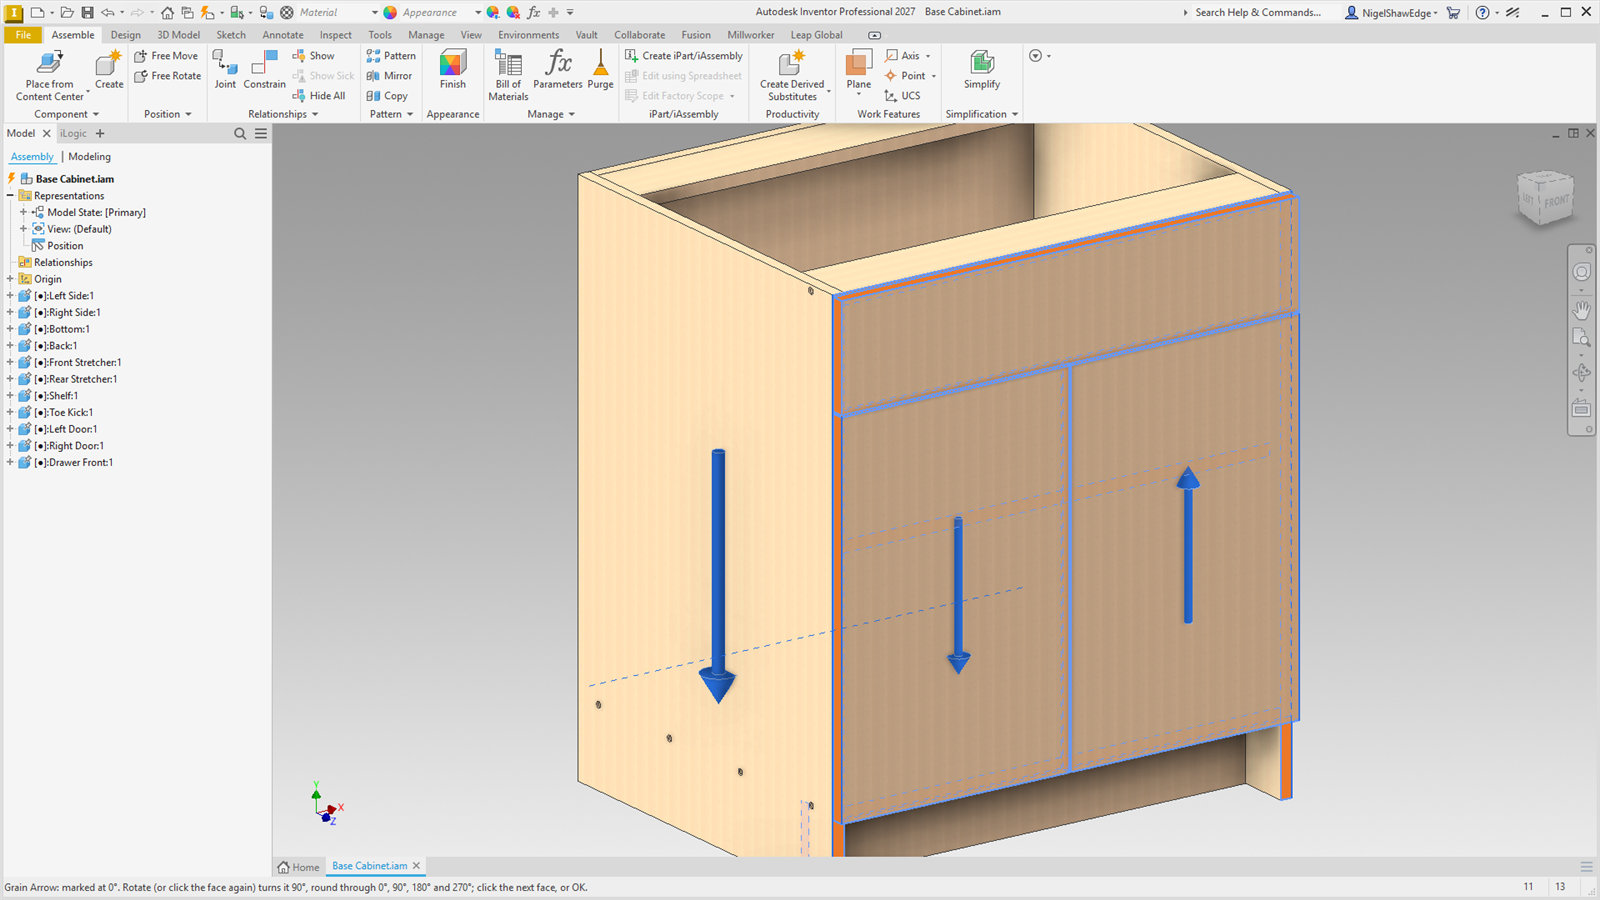
Banded faces show orange, grain edges blue with an arrow along the grain on each veneer face, mitred faces purple, and veneers green (Face 1) or orange (Face 2). Click again to hide.
 Clear Marks
Click panels to remove all their marks.