 Millworker
Help / Fasteners
 Clamex P
Part
Clamex P connector slots in the side's face and the butting panel's end.
Set up
- A side and butting panels, as for Dowels.
- Click Clamex P and choose P-10, P-14 or P-18.
- Pick the side's inside face, its front edge, then each butting panel's face.
- Apply or OK.
Screenshot placeholder
images/clamex-preview.png
1600 × 900 px
Side and bottom picked, P-14 chosen, red straight slot previews with rounded ends in the side's face and the bottom's end.
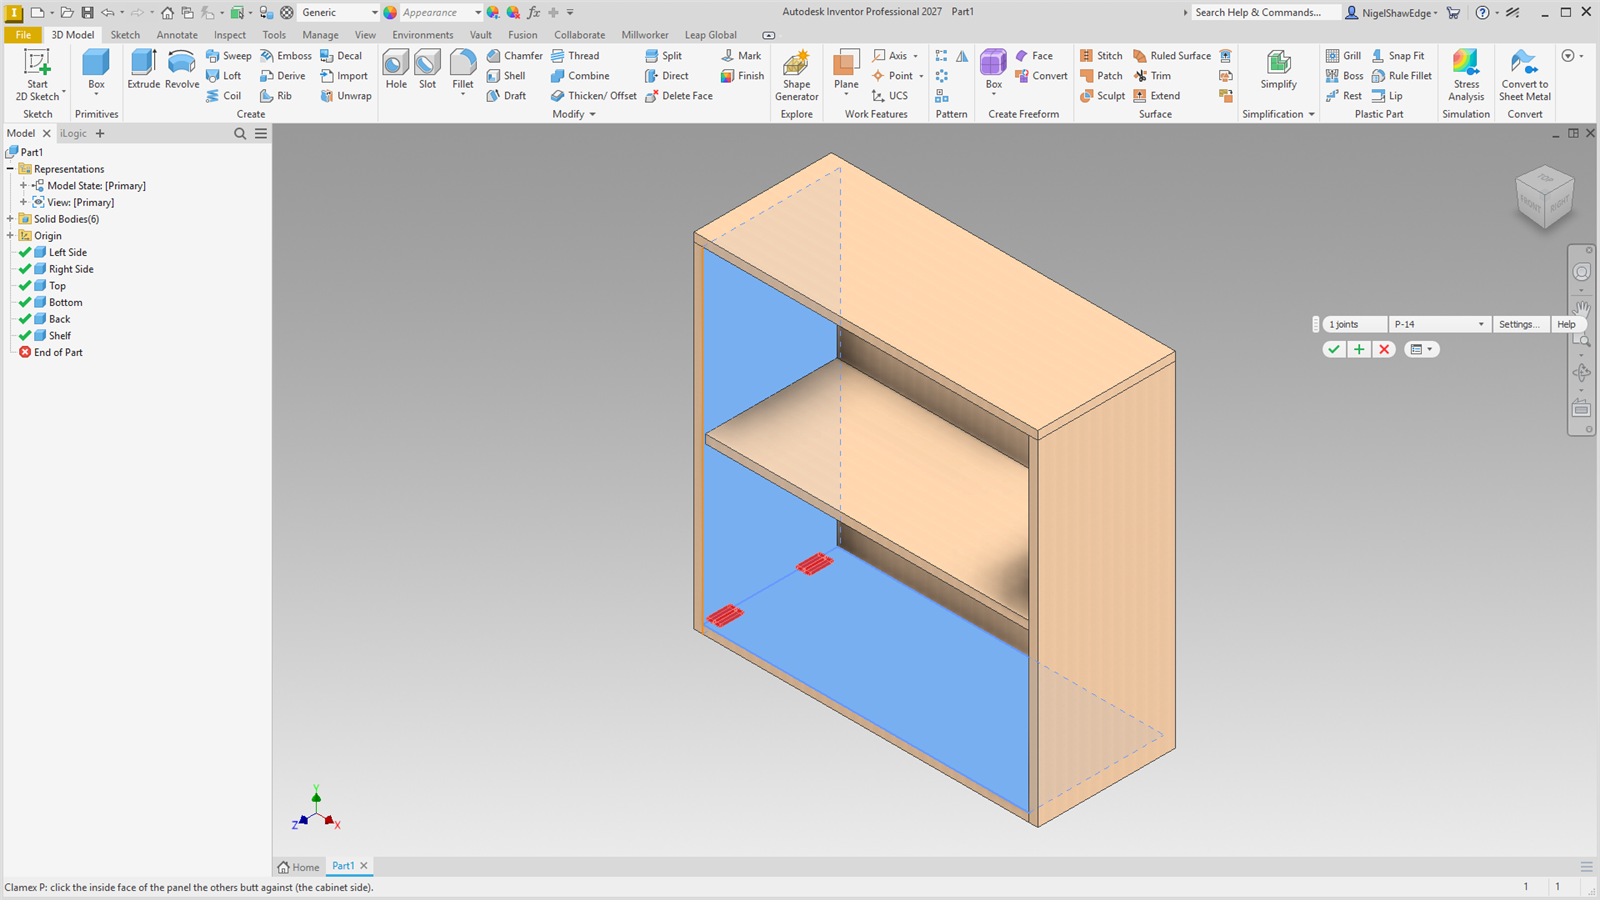
Each slot is straight with rounded ends, 7 mm wide (the P ribs are not modelled).
The Clamex sizes are placeholders: check them against Lamello's CNC data before cutting. The lever's access hole is not drilled yet.