 Millworker
Help / Getting started
 Getting started
Part
Assembly
What Millworker is, what it needs, and a first joint in five minutes.
Millworker adds a Millworker tab to the Inventor ribbon with tools for millwork and cabinet panels. You model a cabinet or a piece of furniture as solid bodies in one multi-body part, and Millworker joins, drills, grooves and shapes those bodies for you. In the assembly made from that part, Millworker marks edgebanding and grain, assigns the shop's materials, places hardware and prints cut lists and bills of materials.
What you need
| Inventor | Autodesk Inventor 2026 or 2027 (one Millworker install serves both). Inventor 2025 and older cannot load it. |
| Windows | Windows 10 or 11, 64-bit. |
| Units | Works in inches by default; millimetres can be chosen in Millworker Settings. |
| Shared data | Optional: a shared folder for the material database, so every PC in the shop uses the same materials, edgebands, profiles and hardware. |
Where the tools are
The Millworker tab shows the panels that fit the document you are in. See The Millworker ribbon for the full map.
- In a part: Settings, Joins, Fasteners, Features, Treatment and Tools.
- In an assembly: Settings, Panel Marking, Materials, Hardware and Tools (and NestCAM, when it is installed).
- In a drawing: there is no Millworker tab.
Your first joint
Set up
- A new part (Standard (in).ipt) with two 3/4″ boxes as separate solid bodies: a cabinet side standing up and a bottom butting against it.
- On the Millworker tab, click Dado Join (Joins panel).
- Click the bottom (the body to extend). It lights up.
- Click Face… in the mini toolbar, then the inside face of the side.
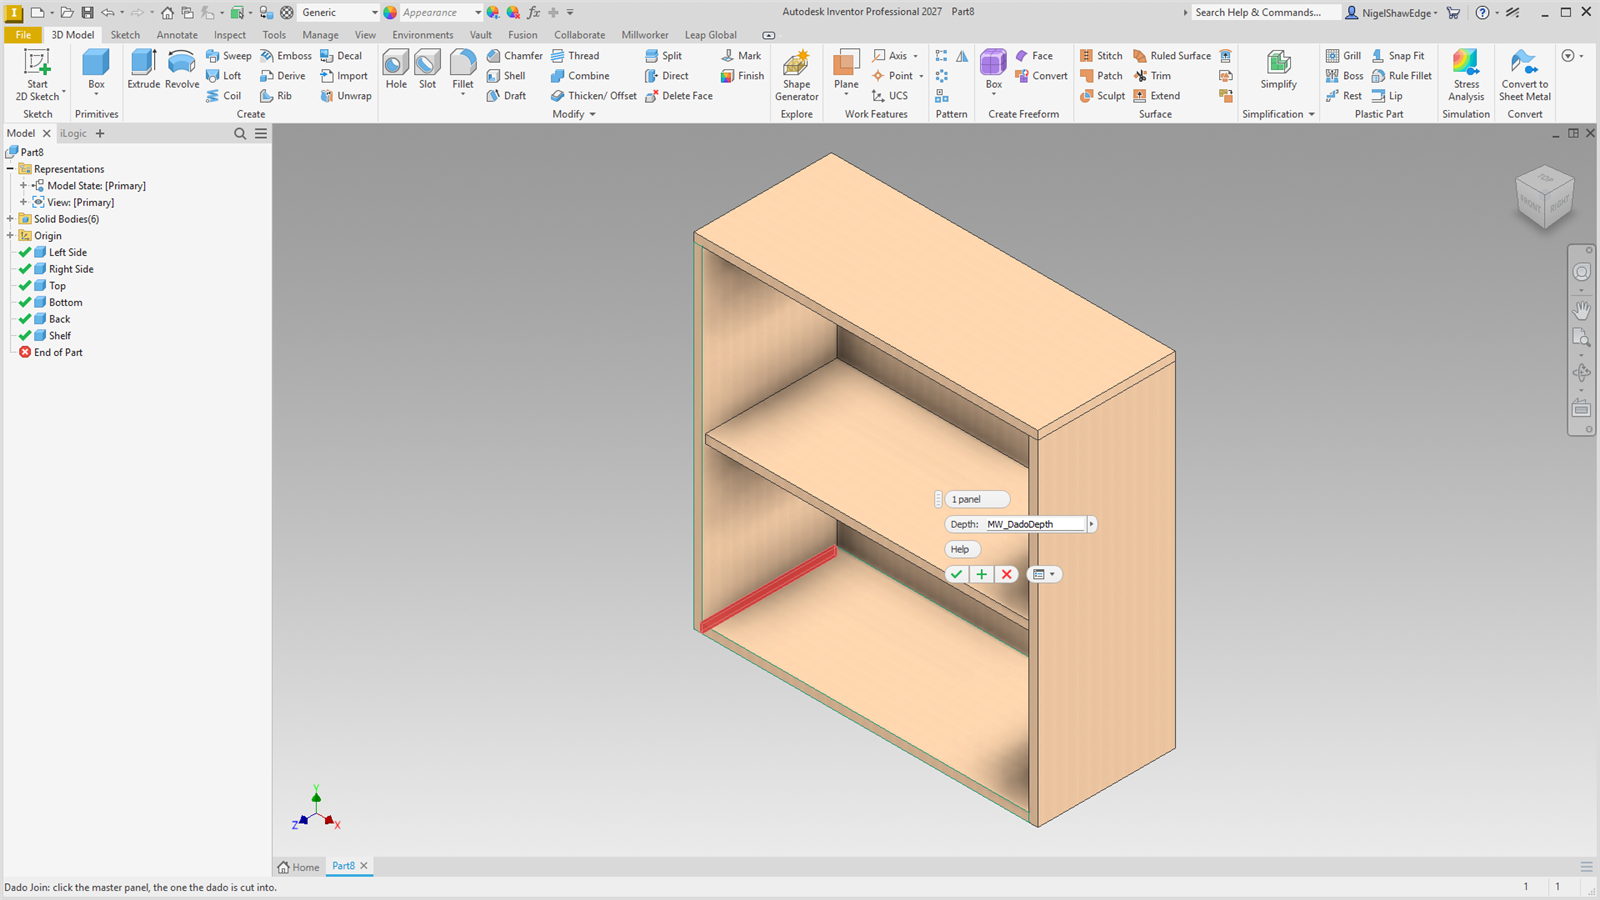
- A see-through red preview shows the dado. Type a Depth or keep
MW_DadoDepth(1/4″). - Click OK. The dado is cut, the bottom runs into it, and a DadoEdge1 node appears in the model browser.
Screenshot placeholder
images/start-first-joint.png
1600 × 900 px
Part with a side and a bottom. Dado Join running: bottom picked, side face picked, red dado preview showing, mini toolbar open beside the model.
Double-click DadoEdge1 in the browser to change it. Every tool works this way; read How the tools work next.